Editor’s note: The following was written by Jeff Olive, Director of Quality and Training, Auto Glass Safety Council.
Though the job was tough, you were able to complete the set spot on; reassembly went great, and all you have left is the clean-up. Not so fast.
Have you ever finished the perfect auto glass installation? Though the job was tough, you were able to complete the set spot on; reassembly went great, and all you have left is the clean-up. You feel like patting yourself on the back for a job well done! You know the customer is going to be happy with the result.

The final clean-up looks excellent, and you didn’t miss anything. Now, it’s on to perform your post-inspection. The next step is to check all the functions related to your work. The defroster vents are clear, and the wipers work. Next, you set the wipers to auto and spray water on the rain sensor. You find that the rain sensor is not working correctly. After further inspection, you notice air bubbles in the rain sensor lens attached to the glass. The job must be redone, and your customer will not be happy. This is not the perfect end to the installation that you anticipated.
It’s happened to all of us. When removing the part identification sticker, you find a scratch (that’s why the sticker was not in the same place as usual). You opened the box to pull out the new door glass, only to find used glass with loose attachments in the box. You pull the tape off the camera mounting attachment to discover cracks in the plastic. You put the windshield on your stand, take the tape off, prep the glass, and, when setting the part, you discover a large oyster chip on the outside corner.
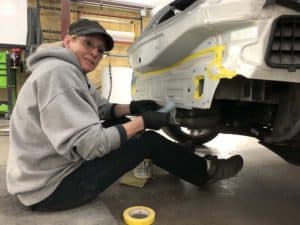
The first step in any auto glass replacement is to obtain a quality part. Whether your part is delivered or you pick it up from the supplier’s warehouse, inspecting it is necessary. It must be part of your usual procedures.
Inspection Before Acceptance
The following steps will help you save time, increase profits, improve customer satisfaction, and lower frustrations.
Before accepting parts at the warehouse or delivering them to your shop, even on a night run, all parts must be inspected. The warehouse should have an inspection station with good lighting. Use it to check your glass. Take the following actions:
- Remove all tape and stickers and clean the glass.
- Check to see if the glass has primer applied. If the part comes with a manufacturer-applied primer, this is okay. Follow your adhesive manufacturer’s instructions for pre-applied manufacturer primer. If you cannot verify that the primer is manufacturer-applied, refuse the part.
- Take all tempered parts out of the box. Remove all stickers. Save the part sticker, reapply for identification, and return if needed.
- Clean the glass. (If the glass is not clean when delivered, the warehouse did not inspect the glass.)
- Look for scratches and rub marks on both sides of the glass.
- Look down the face of the glass. Hold the glass on an angle, resting one edge on your stand while looking down the face of the glass. Look for distortion and bad bends.
- Check to see if the frit is uniform.
- Check for chips and cracks around the complete perimeter on both sides of the glass.
- Look for lamination separation.
- Check the encapsulation for deformities.
- If the part has attached moulding, inspect the moulding for damage.
- Is the attached moulding properly attached, not falling off, and aesthetically acceptable?
- If additional moulding is needed, inspect the replacement moulding for damage.
- Check that all the moulding is in the package.
- Look at all the attachments. Ask these questions:
- Are the attachments mounted correctly?
- Are the attachments secure?
- Are the attachments bent or damaged?
- Are there air bubbles in the rain sensor lens?
- Is the rain sensor lens or bracket bent or broken?
- Check that all wires, windshield, and tempered (antenna, defroster, etc.) plugs are not damaged and that the wires are well attached.
- Check all the tabs of the windshield and tempered parts (defroster, antenna) to ensure they are not bent or missing.
- Have you documented your inspection?
Now that you have completed the part inspection and found no faults, you can sign for the acceptable part at the warehouse and load the part into your vehicle.
If this was your morning inspection of the night delivery at the shop, call the warehouse if any defects were found, re-order, and set up a return for the unacceptable part.
If this was a daytime delivery, don’t sign the paperwork until the inspection is completed. Refuse any non-quality parts.
If the part is now in your mobile vehicle, proceed to the worksite.
On-Site Inspection
Once you arrive at the worksite, follow the on-site inspection below.
If the part is now accepted into your shop inventory and placed in a holding area, it must be inspected when pulled out of inventory.
If you pull the part from your shop’s storage area, whether for in-shop use or loading the mobile vehicle, the complete inspection must be performed again. After the in-shop inspection, you can proceed with the in-shop vehicle pre-inspection for a shop job. The part can now be loaded into the mobile unit if the job is mobile.
Once the part is in your mobile unit and you have arrived at the worksite, it’s time to do a final inspection before you pre-inspect the vehicle. Pull the part out of the mobile unit and inspect the glass. Make sure that no damage has been caused to the part during transport or from removing and inserting other parts in the mobile unit storage rack. Once this inspection is complete, you must compare the part to the part in the vehicle you will replace.
Comparison Inspections
Look for these items when on-site when comparing the replacement part with the part in the vehicle.
- Is it the correct part? (WS, FD, RD, right or left, BG, VG, QG)
- Is the molding correct?
- Is the part acoustic?
- Do the attachments match? (cameras, radar, rain sensor, light sensor, humidity sensor, GPS, remote start antenna, radio antennas, mirror mount, heated WS connections)
- Is the frit pattern the same?
- Is the VIN notch in the correct place?
- Is the heated wiper park area the same?
- It is a fully heated windshield? Are the connections in the same locations?
- Is there a heads-up display?
- Does it have solar tint?
- Is the windshield shaded or tinted? If so, is the tint and shade correct?
If the vehicle has aftermarket tinting on the part to be replaced, discuss this issue with the customer. (Customers assume that the aftermarket tinting will be replaced or that “the glass comes that way.”)
Backlite, Doorlite, and Movable Quarter Glass Comparison
Ask these questions:
- Are all needed attachments correct and positioned correctly?
- For quarter glass and backbites, do all wire connections match? (antenna, defroster)
- Are the plugs correct and in the correct locations?
- Do the tabs match?
Now that you have confirmed you have the correct, undamaged part on-site, you can start your pre-inspection with your customer. You can be confident you will not waste time and money installing a defective or incorrect part.


Comments are closed.